An Overview Of The Semco Tile Resurfacing Process
If you are curious about how tile resurfacing works, here is a rundown of the steps involved and the reasoning behind each.The Semco Tile Resurfacing System is a great way to cover up old, ugly tile on floors and walls in bathrooms, kitchens, outdoor areas and more.
Published: by SEMCO FL
Step 1. Clean The Tile
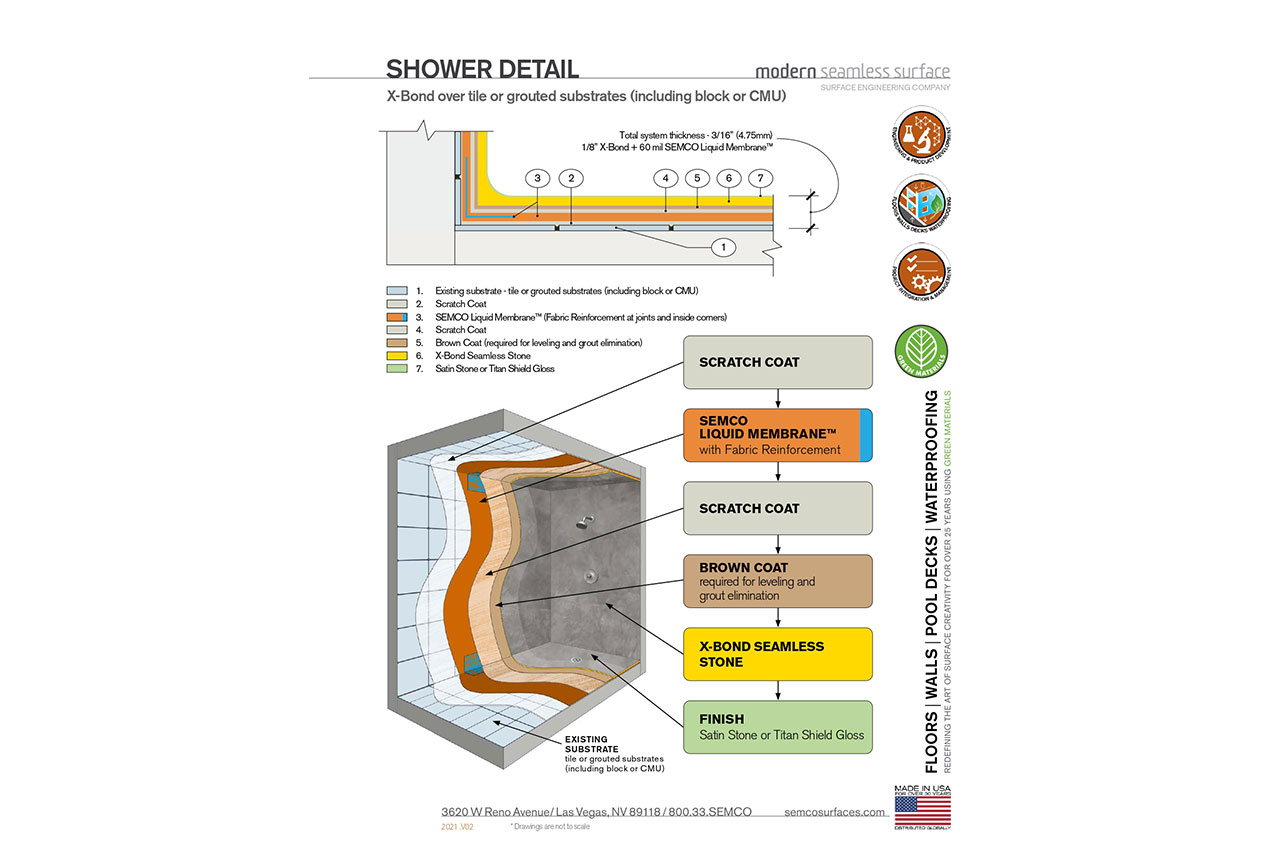
Resurfacing projects are only as good as the bond created with the old surface. Tile is notoriously difficult to get new materials to bond with. The Semco System solves this issue by adding an extra scratch coat layers that provides the bonding pores necessary for the new surfacing material to adhere to. Creating a great bond requires an exceptionally clean surface. This is especially true for commercial kitchen application and any high traffic area. Calcium deposits and magnesium grease, also called efflorescence, interfere with the bonding process and need to be removed. The Semco System makes three different cleaners to address this and they are applied in a systematic way to ensure that the tiles are clean enough to lay the bonding and scratch coat material.Step 2. Rolling Primer And Applying Scratch Coat
After the surface is clean, the next step is to roll the primer and then apply the scratch coat. The primer is a polymer liquid that is rolled out in a very thin consistency onto the surface. The scratch coat is then mixed and applied after the primer is dry. The scratch coat application is what makes the Semco system unique over other resurfacing systems. The scratch coat creates a layer of porous surface that allows the topping material to bond. This is why Semco can bond to tile and metal surfaces better and stronger than most other systems.
Step 3. Grout Line Cover-Up
Most people who are undertaking a tile resurfacing project have the goal of eliminating the grout lines. This is another area that the Semco Tile Resurfacing system beats out the others. Most other tile resurfacing system are a thin, paint like epoxy that is applied haphazardly over the old tile. They can change the color of the tile and grout lines, but they do nothing to smooth the grout lines or cover them up. The Semco system does it differently. The Semco system uses what is called a Brown coat to cover and smoot over tile grout lines, chips, dents, and even whole missing tiles. Unlike most materials that shrink when the dry, The Brown coat is made of a materials that expand. This allows the brown coat to fully penetrate those grout crevices, dents, and missing tile pieces. With the brown coat in place, there will not be much indication that there was ever any tile there to begin with.Step 4. The Finish
After the brown coat is in place, it is time to lay the finishing coats on. Depending on the Semco finish you choose, there might be different procedures. In the video, you can see them laying the natural grain finish. They first start with a skim coat that goes over the brown coat. The skim coat is then sanded to ensure that it is nice and smooth. Depending on the finish you choose, there are times when then sanding will ensure the proper texture for the final stain. Once sanded, a pre-stain is applied. You can see how the pre-stain is applied in the video. As the pre-stain dries, you will start to see the beautifully textured leathering finish that emerges. Once the stains are dry, the final step is to apply a sealer. The sealer protects the surface from water, and other damaging agents.Let’s hear from you!
Ready to take it a step further? Let’s start talking about your project or idea and find out how we can help you.
Have questions? We can help!
Have Any Questions?
We would love to hear from you! Let’s start talking about your project or idea and find out how we can help you.
- Call us: 954-852-7281
- Get a quote: Free Quote
Since 1991
Concrete & Tile Resurfacing Solutions
SEMCO Florida, Innovation driven surface engineering company that specializes in developing surfacing products for floors, walls, pool decks and waterproofing.

