Tile Resurfacing Kit Install Instructions
Do it Yourself Tile Resurfacing Kits – Resurface tile floor without removal
Tile Resurfacing Guide Overview
You might ask why you might even need a tile resurfacing guide. Don’t you just spray paint on the tile and call it a day? Actually, no, our system is a permanent solution to outdated tile and stone that doesn’t just create a thin layer on top. It completely hides the grout lines and creates a new high end seamless finish used by the rich, famous…and the practical! If these steps look too tricky then contact us and we can connect you with one of our certified Semco installers.
This tile resurfacing guide is divided into the following 3 parts:
- Surface Preparation – Clean the surface to be applied and protect adjacent surfaces
- Seamless Stone Application – Apply the varying microcement coats to ensure a strong bond, correct shape and finish coloring and textural effects
- Sealing – Protect the surface and provide the desired sheen
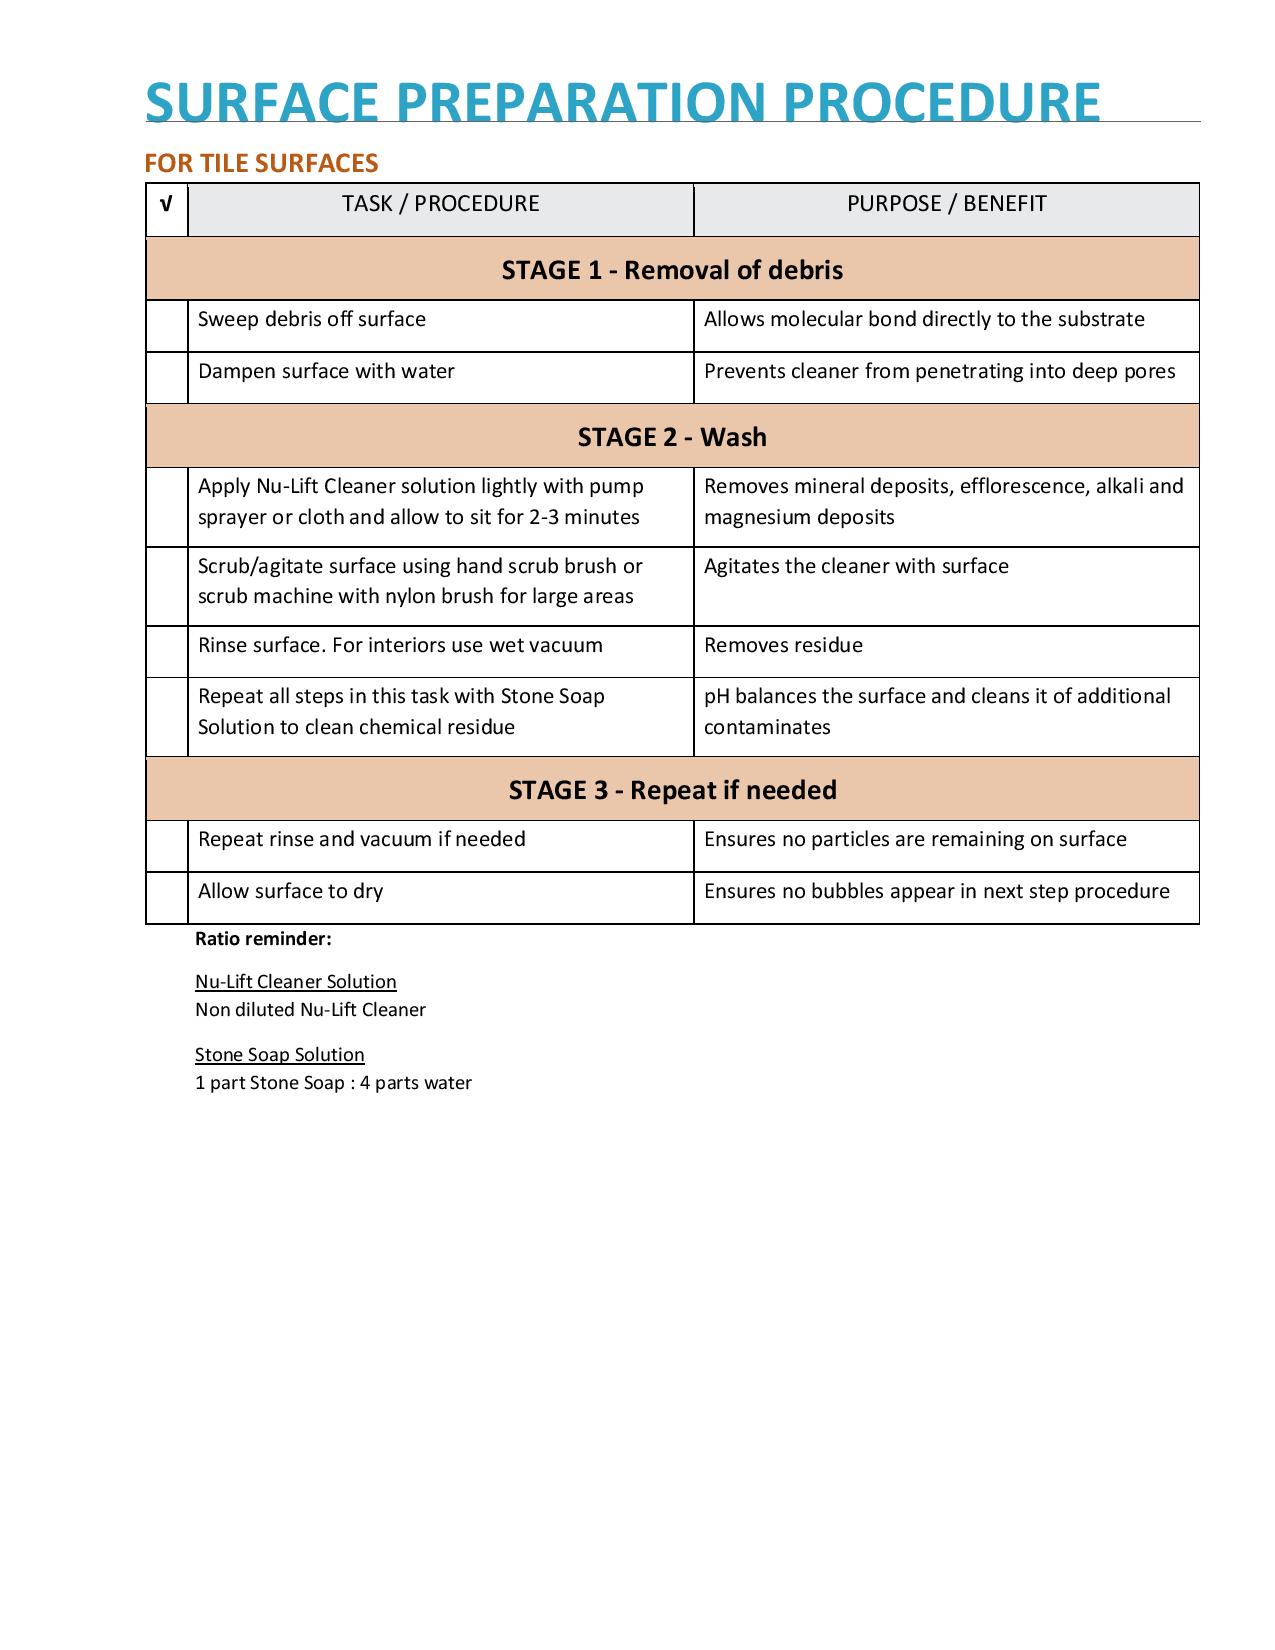
1. Surface Preparation Steps
Surface Preparation Step 1: Remove Debris And Adjacent Items
Remove loose debris, dirt, soap scum with a scraper. Remove adjacent fittings and fixtures, if practical.
- If there is foreign material between the tile and Semco it will inhibit the bond and could create
delamination over time. Semco bonds really well but this is no excuse to apply it to a dirty surface.
Surface Preparation Step 3: Mask Edge Of Work And Protect Adjacent Surfaces
- Semco bonds to almost anything so be sure to protect any adjacent metal, wood, plastic, toilets, sinks and tile that is not being resurfaced
- Semco is water based so if you accidentally got it on something it can be cleaned off while it is still curing. Once it has cured it gets as hard as stone.
2. Seamless Stone Application Steps
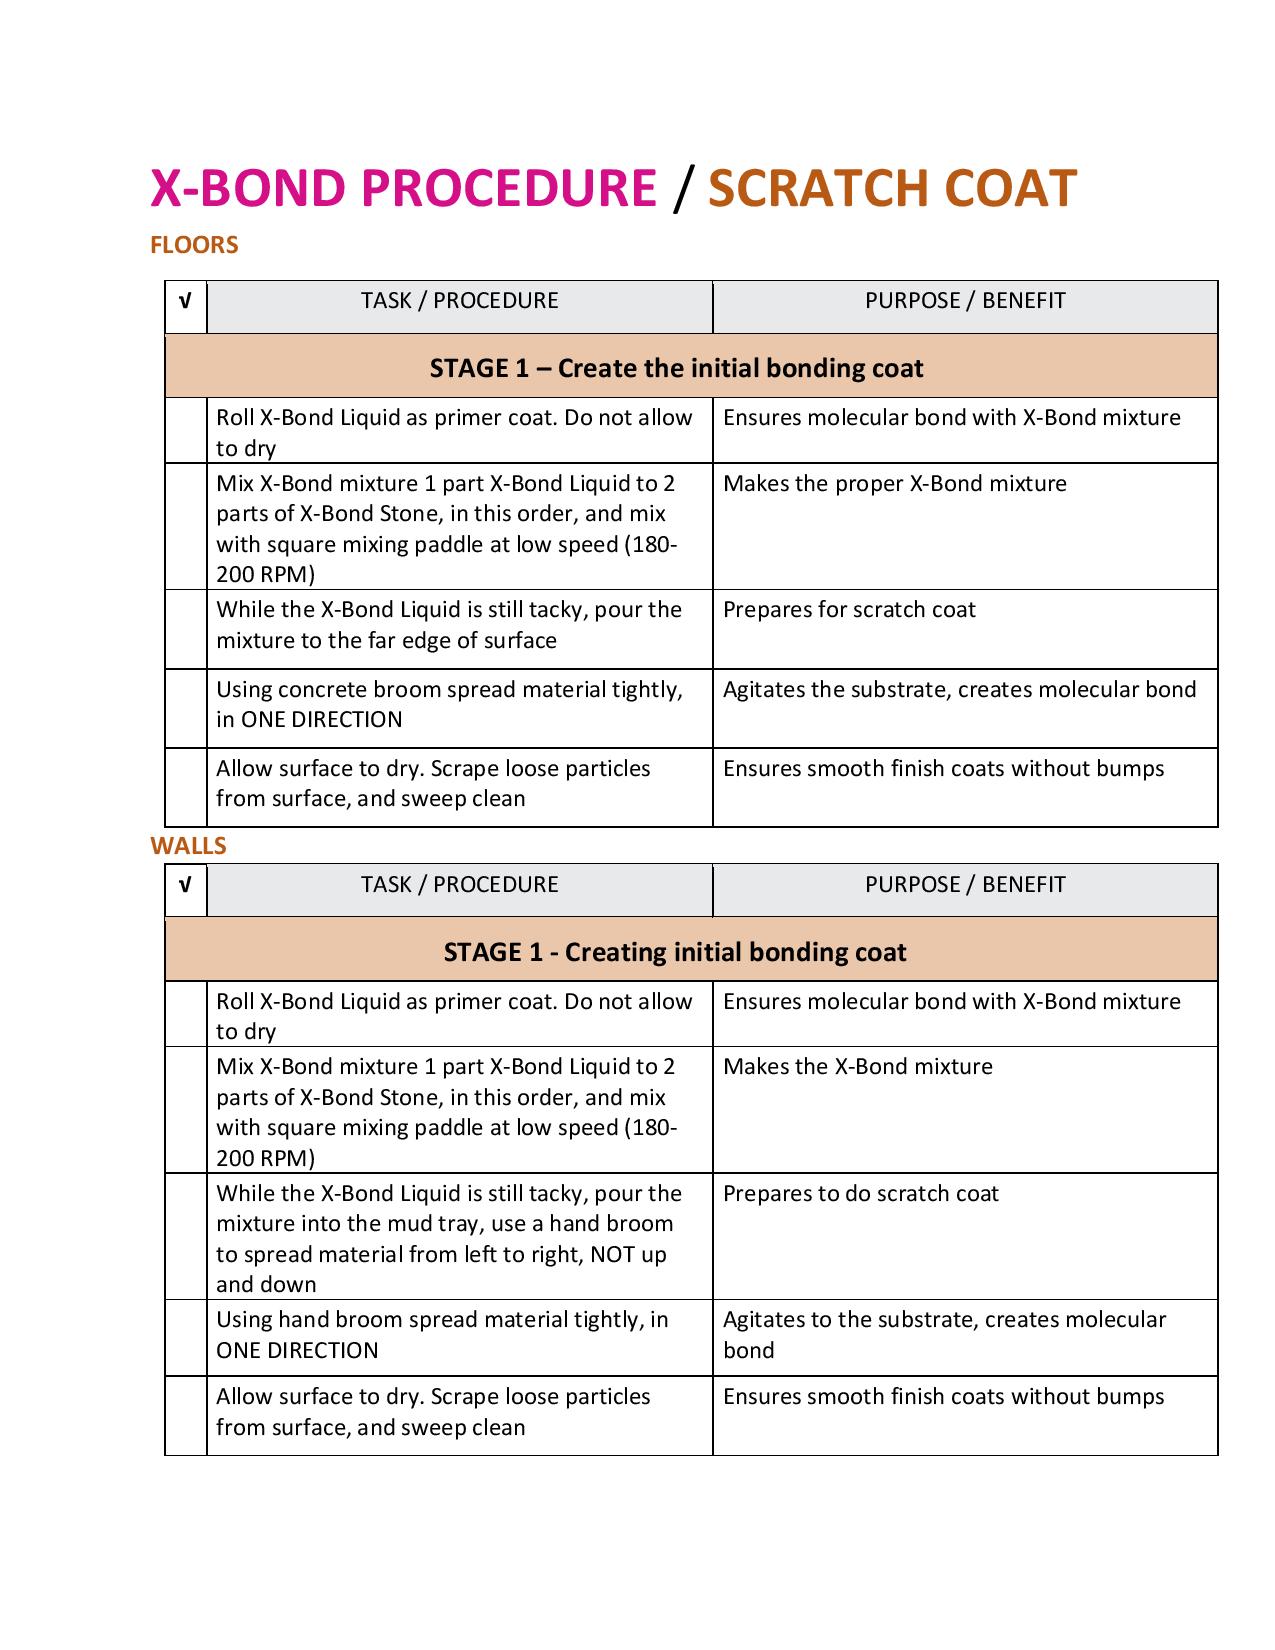
Seamless Stone Part 1: Scratch Coat
1 part liquid to 2 parts stone – Apply primer and scratch coat to create permanent bond to the tile and grout (pour stone in container when measuring, do not pack down)
-
- Use a mud trowel to assist with walls, apply the scratch coat horizontally to promote bonding
- Tools – Mixing paddle, mixing bucket, mixing cups, hand broom
- If you have never applied it before you may want to try to experiment troweling it on a sample board to get familiar with it
- Variations in pressure, distance of the sweep of your hand and the angle of the trowel all create different visual effects
- Consistency is the key to a good finish. This is less important on the coats underneath than the final coats.
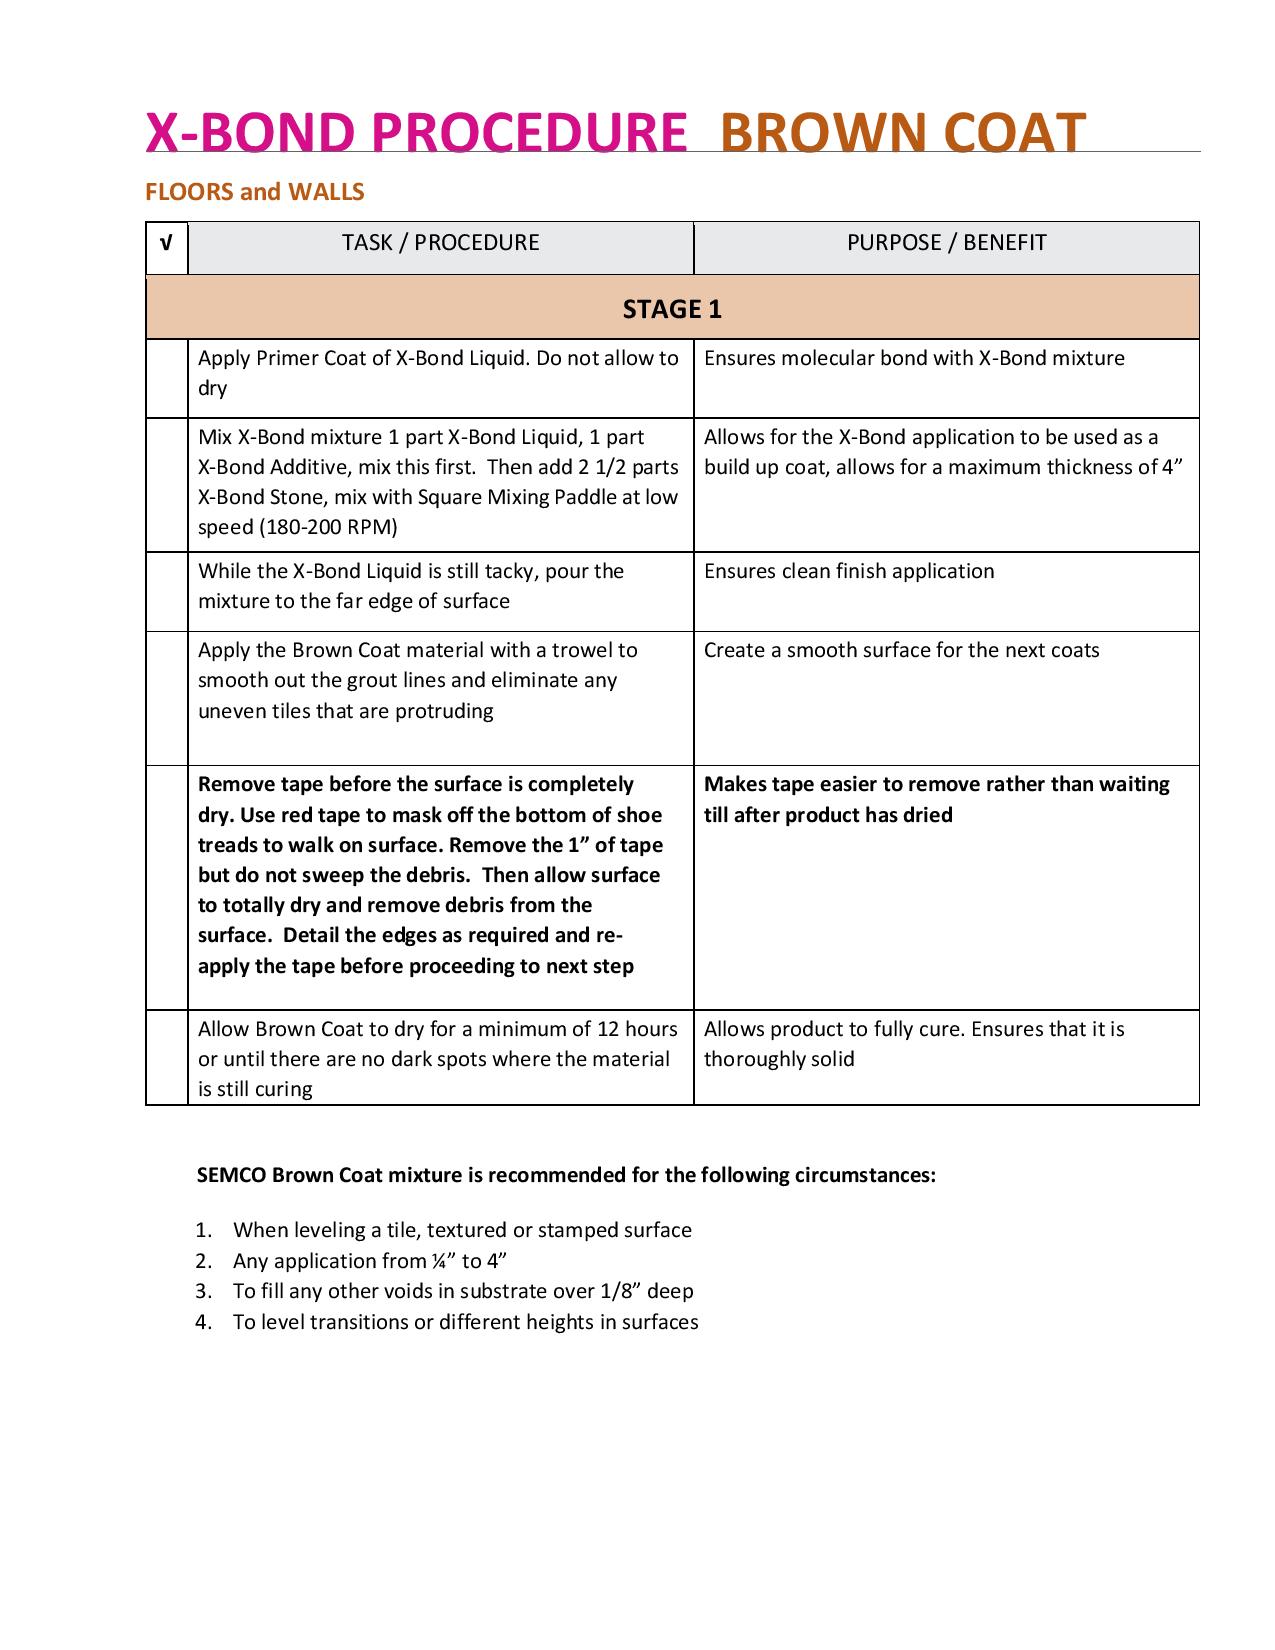
Seamless Stone Part 2: Brown Coat
- Apply brown coat to fill grout joints, voids and surface irregularities
- The brown coat can be up to 6″ thick and is used to create the rough shape.
- If you are going over a smooth substrate like wood or concrete a brown coat is not used.
- Brown coat is particularly helpful over tile because it doesn’t shrink when it cures so it fills grout lines easily.
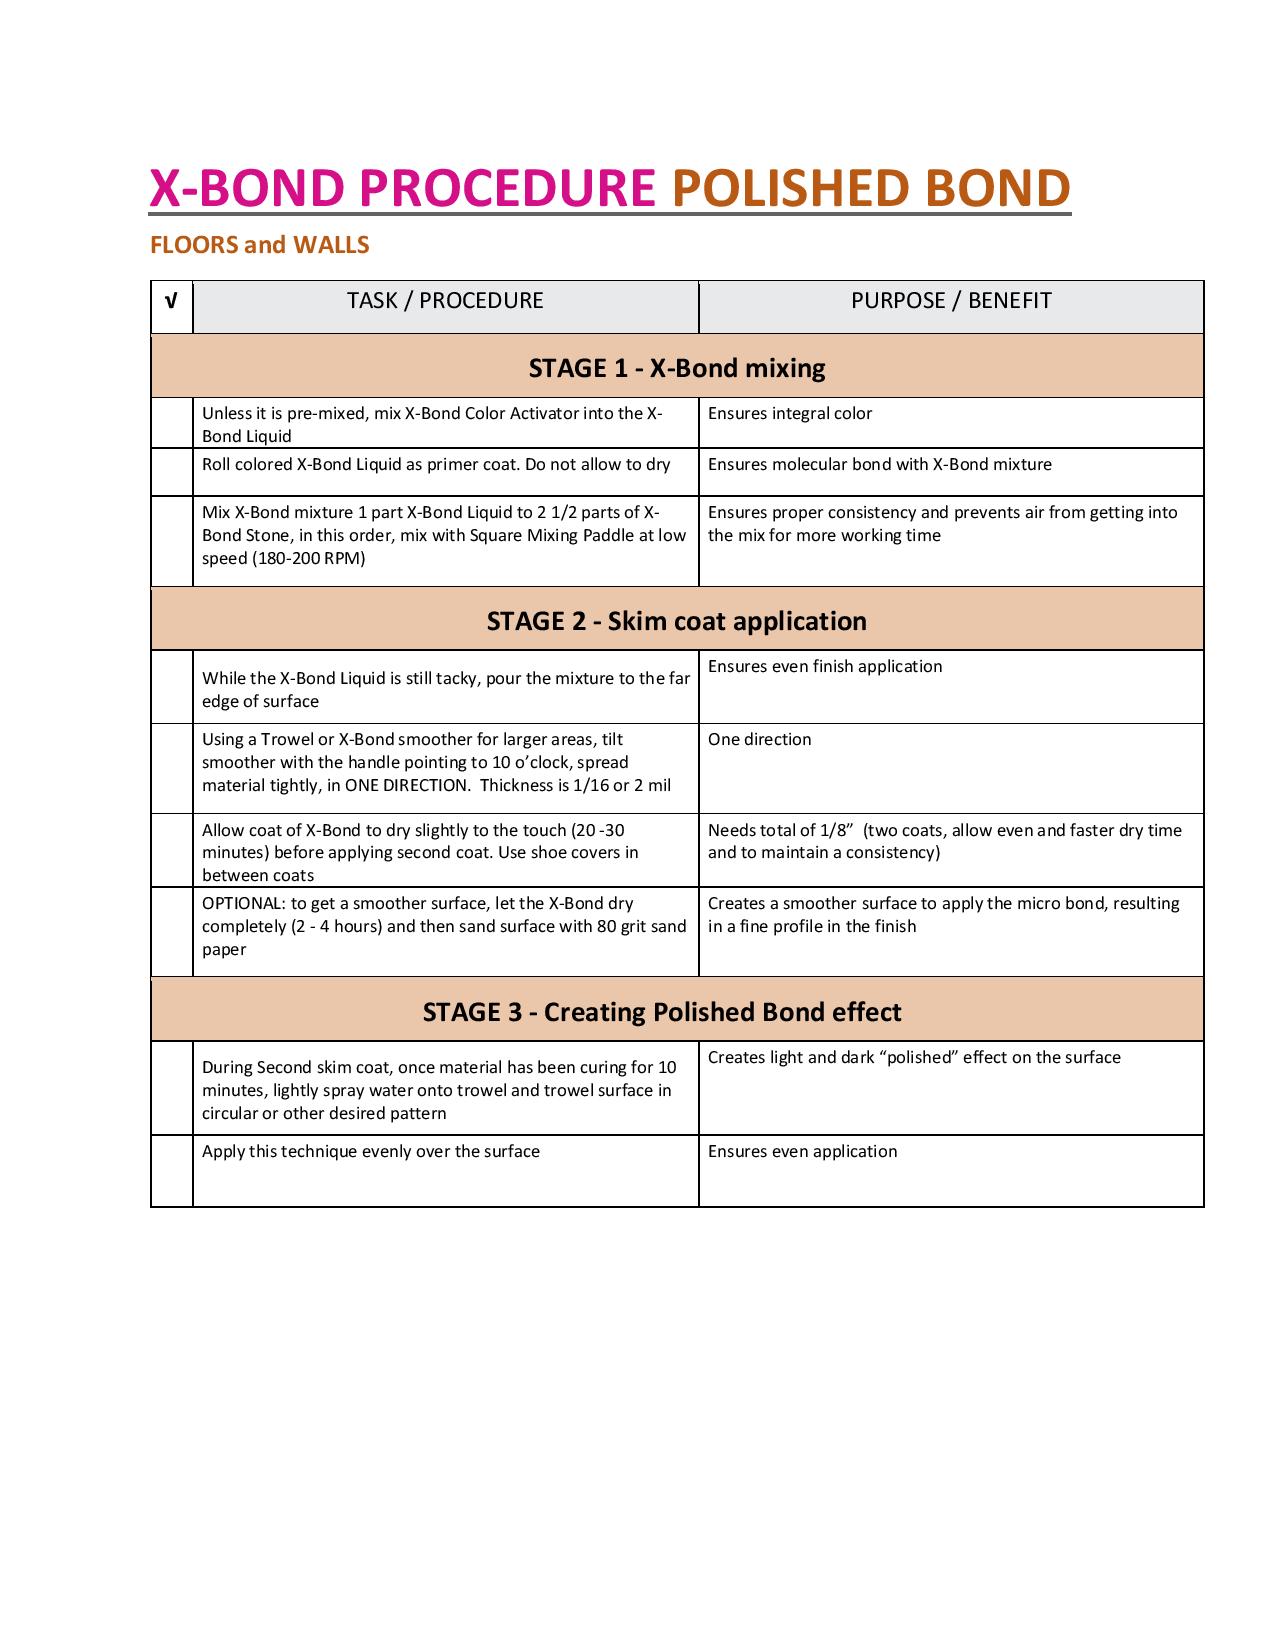
Seamless Stone Part 3: Skim Coats
- Apply two skim coats, sand between coats for a smoother surface.
- This is a thinner mix than the brown coat and should be similar to pancake batter.
- If it is too thick and feels like mud then you put too much Xbond stone in.
- If it is too thin and feels water then you put too much Xbond liquid in.
- The final skim coat shows the final finish before sealer is applied.
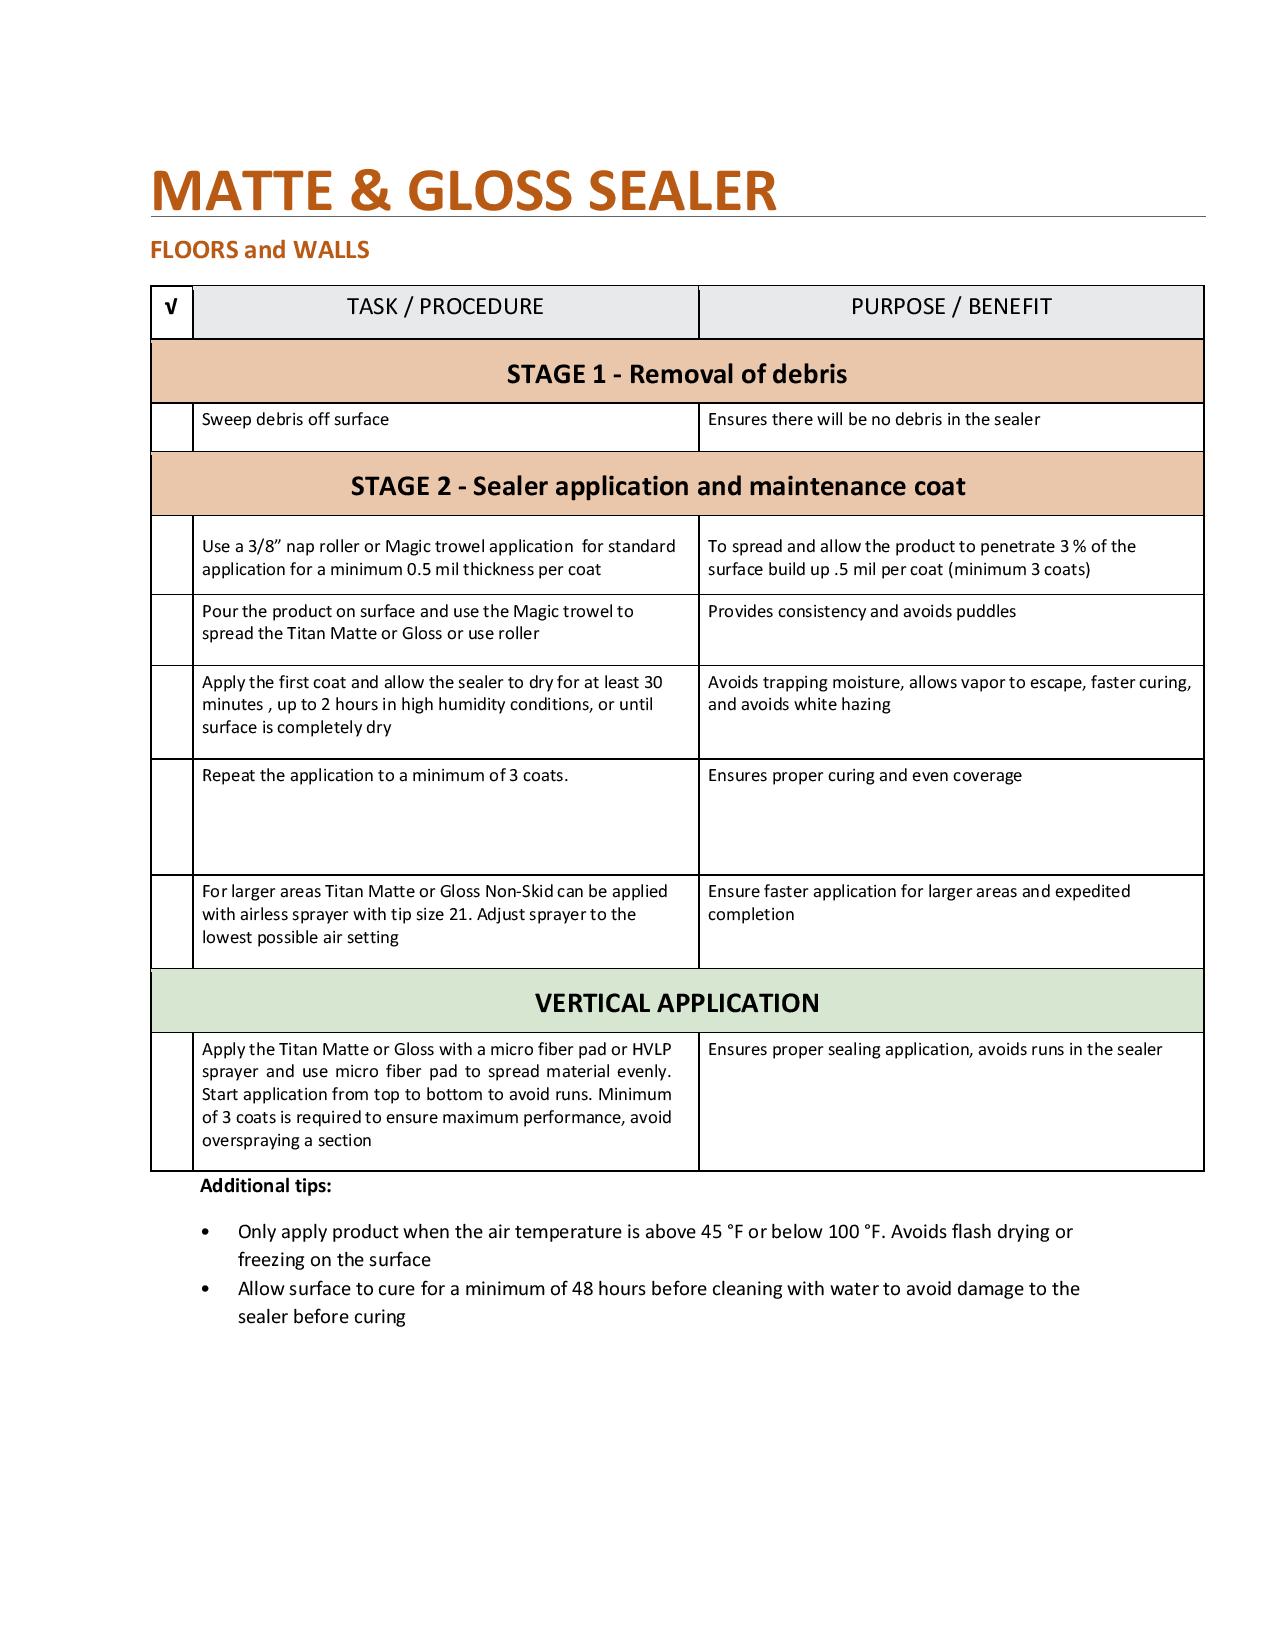
3. Sealer Application Steps
Final Step: Sealer Application
- Allow the final seamless stone coat at least 10 hours to dry before applying sealer
- The sealer can be sprayed or rolled.
- Spraying provides a better finish but be careful or you can create drips on walls
- On walls spray from the bottom up to reduce chance of drips.
- Apply 3 coats of sealer for maximum protection and a minimum of 2 coats
We Do It All
Resurfacing for Tile, Concrete, Hardwood, Epoxy + more!
Semco Florida’s solid surface solutions product line includes four distinct surface treatment systems applicable to a variety of environments and needs. Semco’s Remodel Without Removal is a resurfacing product that allows you to remodel existing surfaces without having to remove the old surface material. The remodel without Removal system can resurface tile and grout, stone, wood, concrete, vinyl, epoxy and more.

